Azure Blob Storage
This document outlines what is required to receive Unacast Data to your Azure Blob Storage container.
You need to provide your Unacast representative the following information, when the requirements below are met:
- The Blob SAS URL
- The file path (path) within your container where the data should be delivered
Creating a Container
Creating an Azure Blob Storage container is the first step in setting up a space for data storage and exchange. You'll need access to your organization's Azure portal with privileges to create and manage storage containers.
Step by step guide to create a container
- Sign in to the Azure Portal
- Navigate to your Storage Account
- In the left menu, select Containers under Data storage
- Click + Container to create a new container
- Enter a container name (e.g.,
unacast-data) - Set the Public access level to Private (recommended)
- Click Create
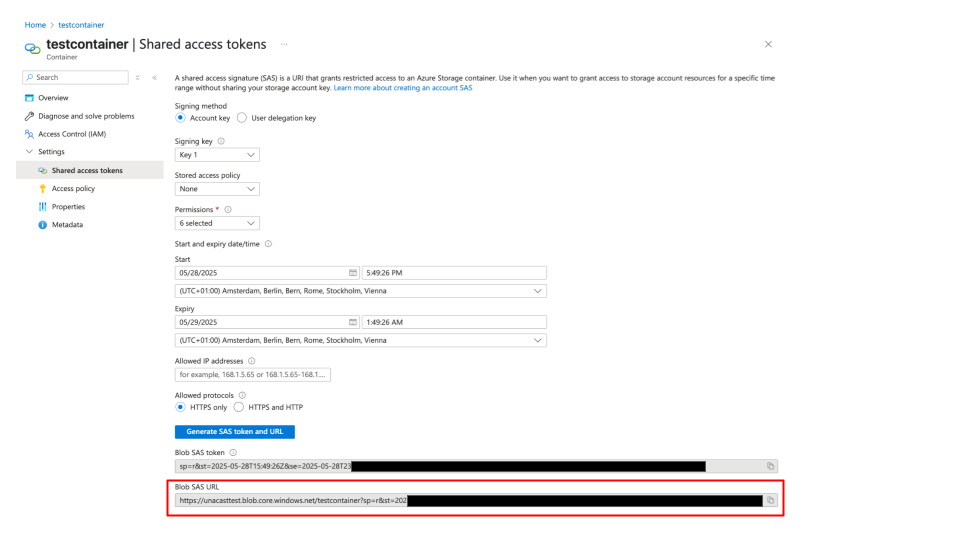
Creating a Shared Access Signature (SAS)
It's important to set the correct permissions to ensure secure access to your container to allow a Unacast service to deliver data to your container.
- In the container page, go to Settings → Shared access tokens
- Add the required permissions: Read, List, Write
- Set the expiry date to at least 1 year ahead, or alternatively use a stored access policy for better management (preferred option)
- Click Generate SAS token and URL
Creating a Stored Access Policy
A stored access policy provides better control over SAS tokens by allowing you to revoke or modify access without regenerating the SAS URL.
Step by step guide to create a stored access policy
- In your container page, go to Settings → Access policy
- Click + Add policy
- Enter a policy identifier (e.g.,
unacast-policy) - Set permissions: Read, List, Write
- Set start and expiry times (recommend at least 1 year ahead)
- Click OK to save the policy
- Click Save at the top of the Access policy page
- When creating your SAS token, select the stored access policy instead of setting individual permissions and expiry